
Changing the Alignment of Data in an Excel Cell
Making an excel spreadsheet look “pretty” is not as daunting as people make it seem. Many people in the workforce will shy away from tinkering with an excel spreadsheet’s layout because they have a fear of making it worse or deleting an important item. Today our goal is to crush the fear of alignment of data in an excel cell!
Have you ever had numbers in the cells adjacent to a text wrapped group of cells? With a giant cell, numbers do not always fill the up the empty space which makes the spreadsheet look awkward. Here is how to fix that issue in the matter of seconds.
There are two ways to do this. The first way is to use the “Alignment” in the general toolbar on top of your excel spreadsheet. It looks like this.
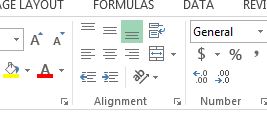
First, highlight the cell or cells that you desire to have their contents aligned. Go up to the alignment toolbar and chose either the left, center, or right alignment. After your desired horizontal alignment has been chosen, chose your vertical alignment (top, center, or bottom). In seconds you can transform how your spreadsheet to look clean and neat!
The second way to go about this would be to right-click the cell or selection of cells that you would like to change the alignment for. Select “Format Cells” at the bottom of the menu and click the “Alignment” tab. From there you can select the type of Horizontal and Vertical alignments with a drop down menu. You can also use the “Orientation” area to rotate the data of your cell if you really want to get crazy! Once you are finished changing your settings, click OK.
Check out the demonstration below to get a better understanding of the two ways to change the alignment of data in an excel cell.
We hope you found todays quick and easy Excel lesson beneficial. Don’t forget to follow ups on Social Media and subscribe to the blog to get convenient, quick tips like this, and other great Excel training tips so that you can take the fear out of Excel.
Like Learn Excel Now? Sign up for the newsletter above! And don’t forget to connect with us on social media and share your favorite Excel tips with your networks!
-Kevin, Learn Excel Now
Responses