Setting a Print Area in Excel

 Printing with excel is always a challenge. Even excel experts have difficulties printing exactly what they want from their excel spreadsheets. If this is a daily fear or challenge at your workplace this post is for you!
Special Paste
To make printing excel spreadsheets quick and easy, you can define a print area that includes just that selection of cells that you desire to be printed. A print area is a range of cells that you can designate to print when you do not want to print the entire excel spreadsheet or continuously highlight cells then search for “Print Selection”
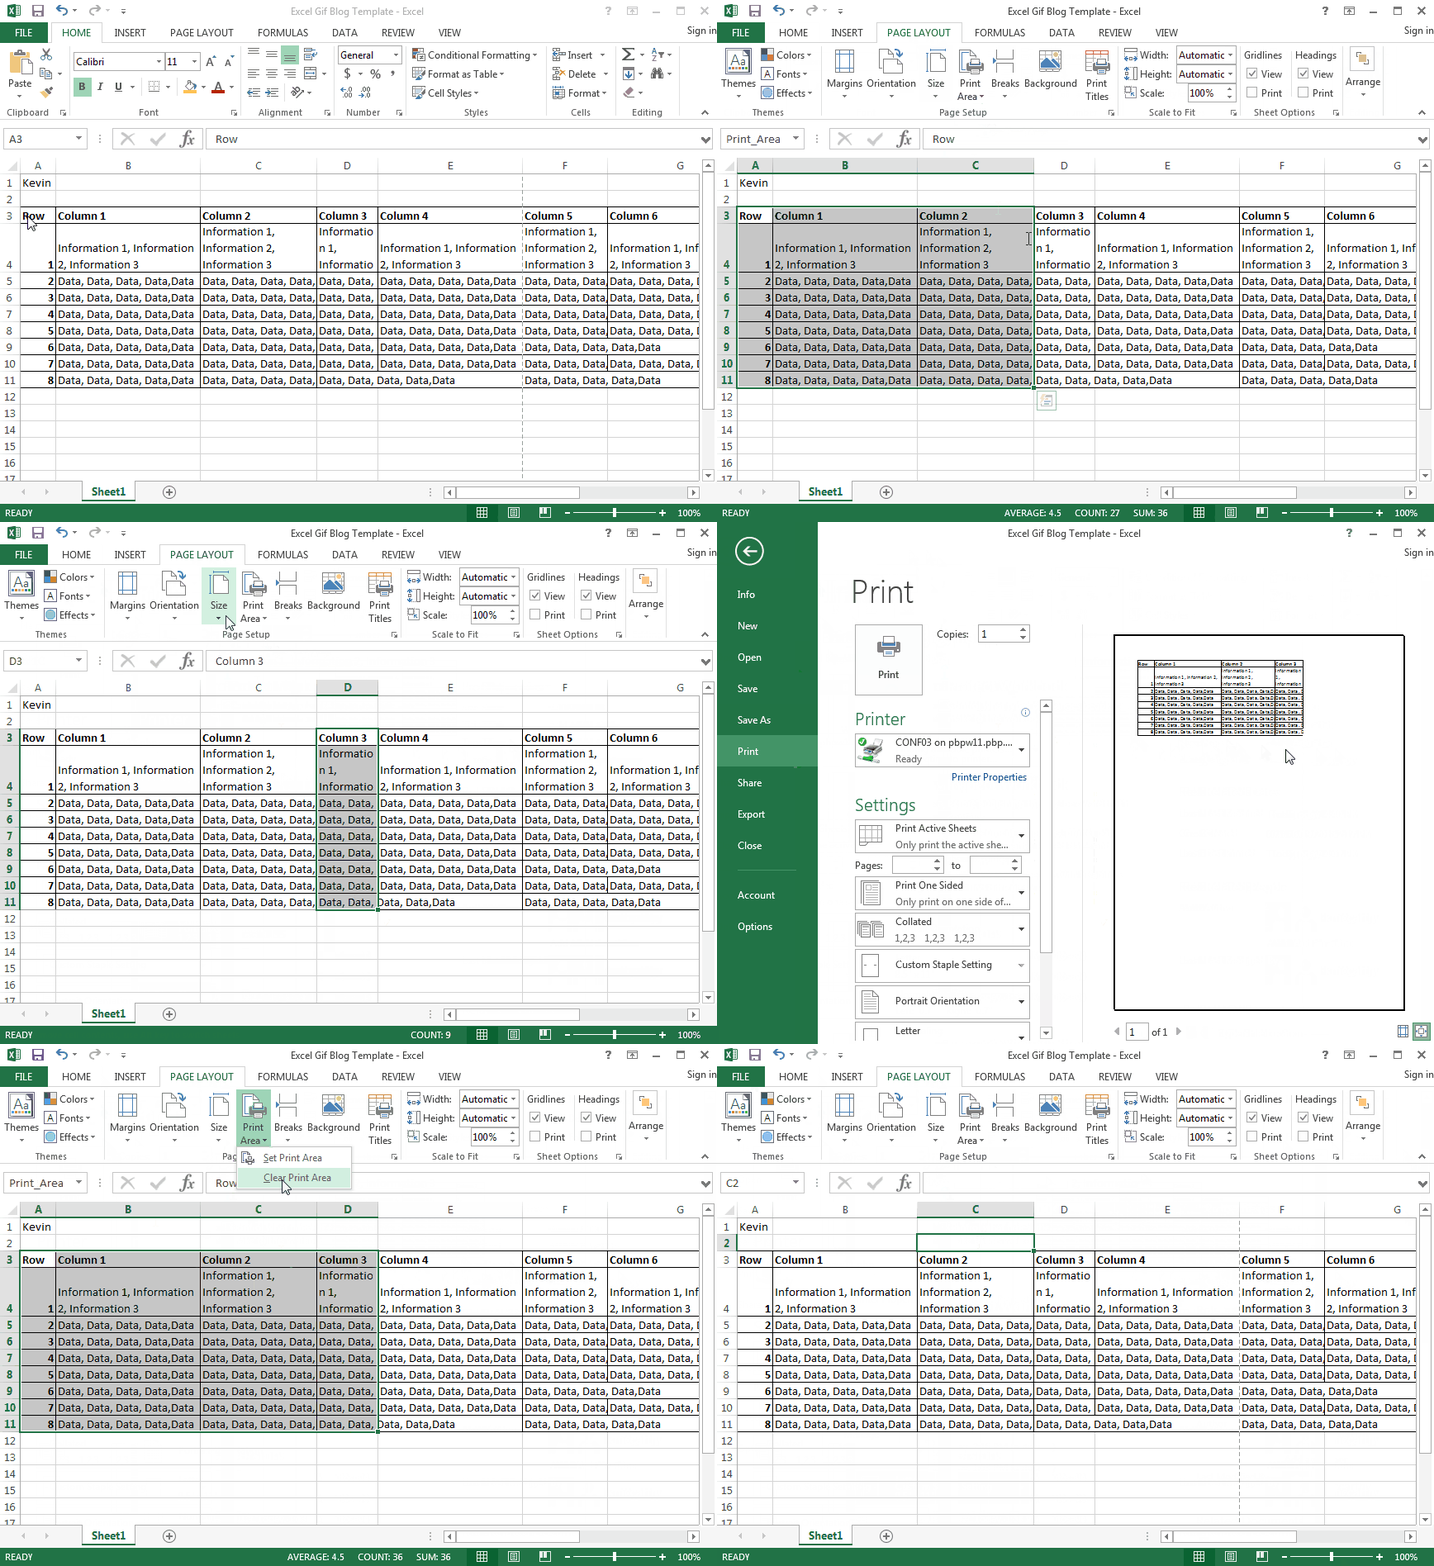
To set a print area in excel spreadsheets, all you have to do is highlight the cells that you desire to be printed (called the print area) then move your cursor up to the Page Layout tab in the Page Setup group, click the Print Area dropdown arrow, then click Set Print Area. To check if you have done this correctly, you can go to the “print” option in the File group to make sure your designated cells will be printed.
To add cells to an existing print area, simply highlight the cells that are adjacent to your previous designated print area cells then move your cursor up to the Page Layout tab in the Page Setup group, click the Print Area dropdown arrow, and then click Add to Print Area. To check if you have done this correctly, you can go to the “print” option in the File group to confirm that the new cells have been added to your previous print area.
The only catch to this is that if the new cells that you would like to add are not adjacent to your existing print area than another separate printer area will be created. Additional print areas will be printed on separate pages.
The print area that you have designated will be saved when you save your excel spreadsheet so that each time you want to print this spreadsheet, your designated print area will only be printed.
Finally, if you would like to remove the print area, just highlight the cells that you would like to clear then move your cursor up to the Page Layout tab in the Page Setup group, click the Print Area dropdown arrow, then click Clear Print Area. Just remember that if you clear one print area than all the other print areas you have will be removed from your spreadsheet. To check if you have done this correctly, you can go to the “print” option in the File group to confirm that the print area has disappeared so that you can successfully print the entire excel spreadsheet.
Now you are a print area expert! You now know how to select, add, and clear print areas in excel spreadsheets. Hopefully this post has helped you conquer your fear of constantly printing specific sections of excel spreadsheets!
We hope you found todays quick and easy Excel lesson beneficial. Don’t forget to follow ups on Social Media and subscribe to the blog to get convenient, quick tips like this, and other great Excel training tips so that you can take the fear out of Excel.
Like Learn Excel Now? Sign up for the newsletter!
-Kevin, Learn Excel Now

