
Inserting Images in Excel Worksheets
Placing images into your Excel worksheets can be beneficial for several reasons. For one, doing so can help pair product photos with their inventory descriptions or add employee profile images to their spreadsheet data. Finally, if you want to insert your company’s branding to your worksheets, you can add a level of professionalism to the documents you create.
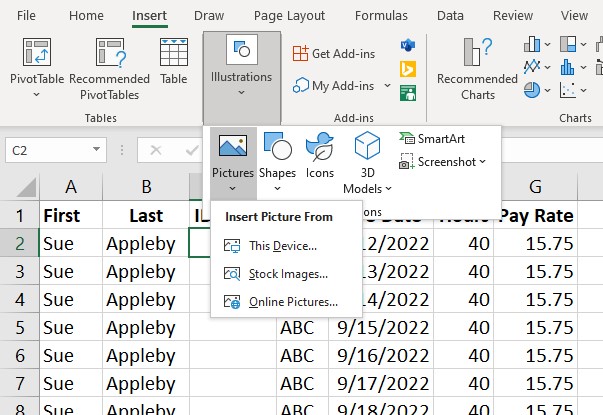
Here’s how to add images in Excel.
The IMAGE Function
To use the IMAGE function, enter the following formula into the cell of your choosing:
=IMAGE(source, [alt_text], [sizing], [height], [width])
This will enable you to insert pictures into your cells from a source on the web, as well as add alternative text to the image.
Here’s a breakdown of the formula’s elements.
- Source: This is the only required element to add. The rest are optional and can be used to enhance the look and organization of your worksheet. The source is the URL path of the photo file you want to upload.
- Alt_text: Alt text is used to describe an image for accessibility purposes.
- Sizing: Sizing controls the dimensions of the image. You can choose to fit the picture into the cell while maintaining the aspect ratio, fill the cell with the image while ignoring the aspect ratio, or customize the size of the image.
- Height & Width: This element is used to customize the size of images, where you can key in the height and width measurements you want the image to have.
We hope this helps you incorporate images into your Excel worksheets with ease and confidence!
For more ways to level up your spreadsheets, check out our workshop.
And, we’ve got you covered with an entire library of solutions that will empower you to work smarter!
Like Learn Excel Now? Follow us on social media and share our content with your networks!