
Excel Find & Replace: Building Fundamental Skills
Excel contains tons of built-in tools designed to help you do what you need to. This week we are talking about one of those tools, the robust Find and Replace tool. In the following guide, we will explore how to use this tool and situations where it could be needed.
Simple Find Function
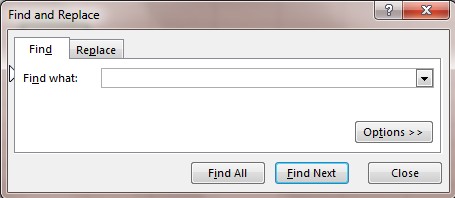
To find something in Excel, you use the simple Find function you use in any other program, Ctrl F. This opens the Find dialogue box where you can enter the text of what you’re looking for. However, Excel contains other built-in options in the dialogue box that allow you to go beyond the simple find function. We will explore those options later in this guide.
The important thing to remember is the keyboard combination Ctrl F at the same time.
Replace What You Found
As you can see in the above image, the dialogue box contains a tab that states “Replace.” Once you found the items you are looking for, you can easily replace them using this tool.
Let’s say you had the following spreadsheet listing what clients each salesperson represents:
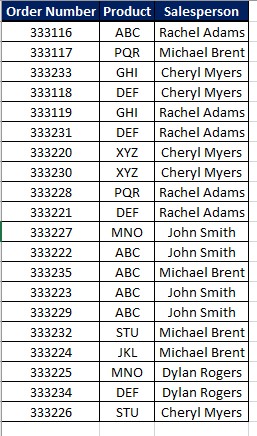
Now, your boss informs you that Cheryl Myers will be leaving the company. A new employee, Shania Reynolds, will be taking over her sales. Manually replacing Cheryl’s name with Shania’s in each instance would be tedious and time consuming (especially in larger worksheets!). Plus you could always run the risk of missing a location. Luckily, you can use the Replace tool to quickly find and replace all instances in a few clicks:
- Use the Ctrl F keyboard combination to open the dialogue box
- On the Find tab, enter the data you want (Cheryl Myers in this instance)
- Click on Find All to ensure all instances are located
- Then click on the Replace Tab
- On the “Replace With” line, enter the new data (Shania Reynolds in this instance)
- Click on Replace All
As you can see in the following GIF demonstrating these steps, all instances of Cheryl Myers are replaced with Shania Reynolds

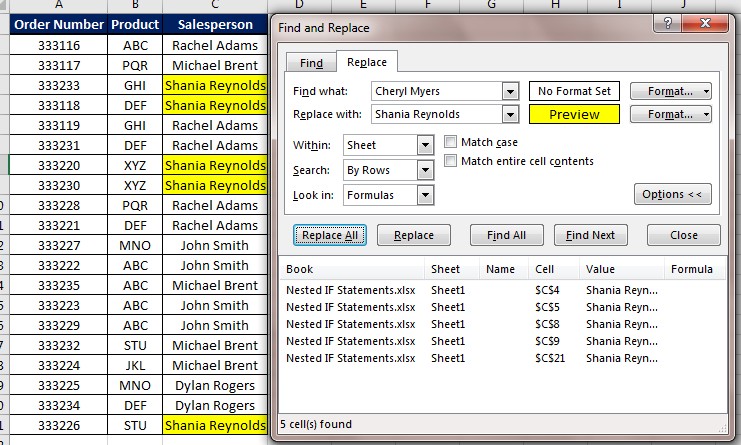
Special Formatting for Replacing
The options for Excel’s Find and Replace tool don’t stop there. You can also use the tool to format specific cells. Let’s say your boss wanted you to highlight the new employee’s areas for quick reference. Again, you can do this manually, but it would be a waste of time. Instead, you could:
- Use Ctrl F to open the dialogue box
- Enter the data you want to find (Shania Reynolds)
- Click Find All
- On the Replace Tab, open the Options dialogue
- Select Format on the “Replace With” line
- Go to the tab that says “Fill”
- Select the color you wish to use for highlighting (yellow)
- Click “Replace All”
As you can see in the following GIF, the name is still in the cells, but it has been highlighted yellow.
We at Learn Excel Now hope you now feel comfortable using the Find and Replace tool. This tool contains other formatting options to change the cells containing data you found. Using the tool is a matter of personal need, but there are many situations where it comes in handy.
Like Learn Excel Now? Follow us on social media and share our content with your networks! And don’t forget to sign up for the Newsletter.
Kevin – Learn Excel Now
Responses