
Excel Data Validation: An Introduction
Excel data validation allows you to set specific criteria for the type of data that can be entered into a cell or group of cells. In addition to creating that criteria, you can write a brief message on what can be entered into the cell and error message when the wrong information is entered.
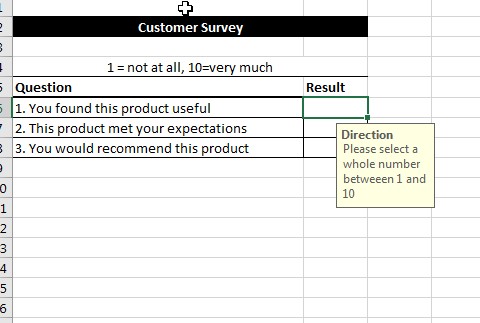
In today’s example, we will use the following customer survey as our example:

Here, we need to set data validation so only whole numbers between 1 and 10 can be entered. To do this, we will:
- Go to the Data tab
- Go to Data Validation
- Open the Data Validation Dialogue box
- On the Settings tab, set the range (whole numbers between 1 and 10)
- On the Input message, enter our unique message
- On the Error Alert tab, enter your custom error message
Once you hit okay, the rules will apply. Here is a demonstration in Excel:
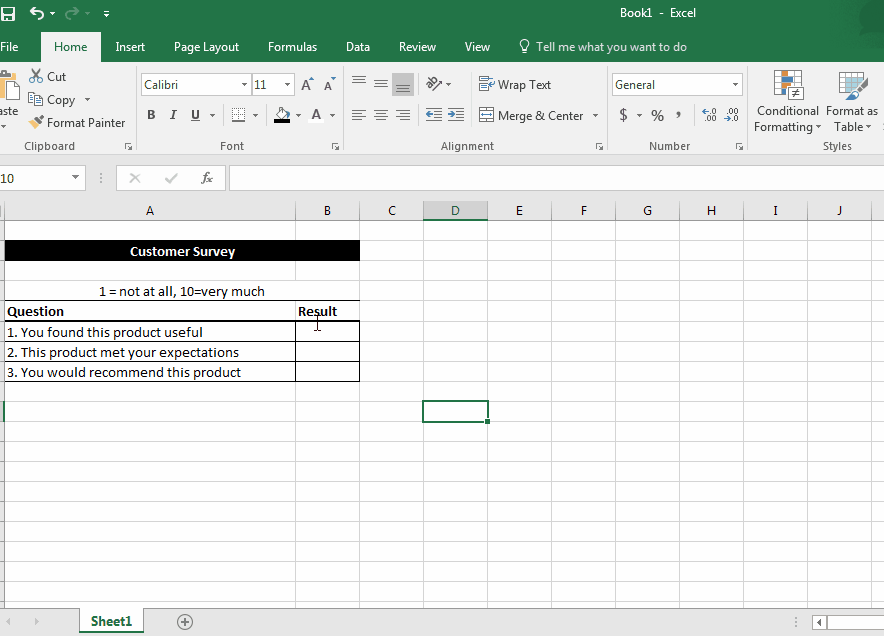
As you can see, the only numbers that can be entered are whole numbers between 1 and 10. There are a variety of reasons to use Excel data validation and it depends on the situation and problem you’re trying to solve.
We here at Learn Excel Now hope you found today’s lesson on Excel data validation useful.
Like Learn Excel Now? Follow us on social media and share our content with your networks! And don’t forget to sign up for the Newsletter
Kevin – Learn Excel Now